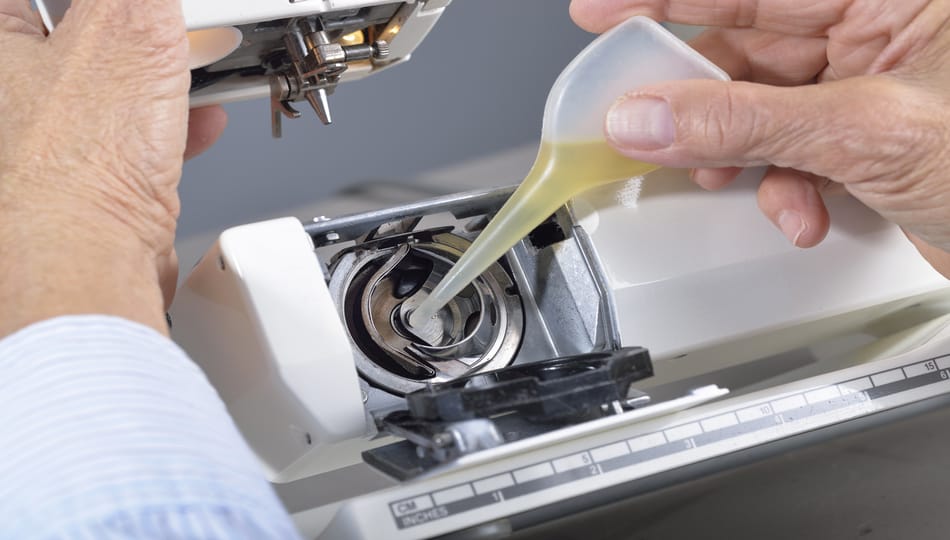
Like any mechanical item, sewing machines must be maintained regularly to ensure longevity and efficient functioning. Appropriate lubrication is an essential part of sewing machine maintenance. Oiling is a basic maintenance procedure that keeps Singer sewing machines’ gears and moving parts operating correctly. In this easy-to-follow tutorial, we’ll walk you through the process of knowing how to oil a Singer sewing machine step-by-step so it stays in excellent condition for all your sewing endeavors.
Does Your Singer Sewing Machine Need Oil?
Let’s examine why it’s crucial to oil your Singer sewing machine before getting started:
1. Reduce Friction: When a sewing machine is used, its moving components—joints and gears—create friction. As a lubricant, oil lowers friction and guards against wear and tear.
2. Sustain Performance: Consistent oiling keeps the machine operating at peak efficiency, producing seamless stitches and avoiding problems like jams or missing threads.
3. Extend Lifespan: Regular maintenance, such as oiling, will help your Singer sewing machine last longer and ultimately protect your investment.
Get practical and see how to oil a Singer sewing machine step-by-step.
Step 1: Assemble Your Materials
Make sure you have the following materials on hand before you begin oiling:
Singer Sewing Machine Oil: Use premium oil, especially for Singer sewing machines. General-purpose oils are not recommended for use with sewing machines.
Use a lint-free cloth or Q-tips to apply the oil precisely and remove any excess.
Screwdriver: To thoroughly oil some parts of your sewing machine, you might require a screwdriver.
Step 2: Determine Oiling Points
Particular areas on every type of sewing machine, including Singer models, need to be oiled. For an exact identification of these points, refer to the sewing machine manual. Typical locations for oiling are:
Bobbin Case region: Examine this region for any locations where metals may come into contact with one another.
Needle Bar: Find the needle bar and its joints and connections.
Presser Foot Bar: Examine the presser foot area for moving components.
Feed Dogs: Recognise the moving parts of the feed dogs.
Step 3: Get Your Sewing Equipment Ready
Follow these instructions to have your sewing machine ready before adding oil:
1. Turn Off and Unplug: Make sure the power supply is off and your sewing machine is unplugged.
2. Remove the Needle and Presser Foot: To readily access the machine’s internal parts, remove the needle and presser foot.
3. Clean the Machine: Clear any dust or lint from the designated oiling locations using a brush or a hoover attachment.
Another article: When is the Best Time to Buy a Sewing Machine – Best Sale Season Tips
Step 4: Use the Lubricant
It’s time to oil your sewing machine now that it’s ready. Observe these rules:
1. Apply a Drop of Oil: Lightly moisten each designated oiling spot by dipping the oiler’s tip into the sewing machine’s oil.
2. Apply precisely: Use a lint-free cloth or Q-tips to remove excess oil and apply precisely. This guarantees that the appropriate amount is applied without causing any mess.
3. Move the Machine: To produce a few stitches after oiling, turn the handwheel by hand or according to your sewing machine’s instructions. This facilitates the oil’s equal distribution among the moving components.
Step 5: Test and Reassemble:
When you’ve oiled every area that needs it, it’s time to put your sewing machine back together:
1. Replace Presser Foot and Needle: Reinstall the presser foot and needle.
2. Power Up and Test: Switch on your sewing machine and stitch a small amount of cloth on a swatch. This enables you to verify that the device is operating smoothly and that the oil is evenly dispersed.
In summary
Regularly oiling your Singer sewing machine is a straightforward but essential maintenance step that guarantees the machine’s life and best performance. By following this easy-to-follow guide, you can confidently know how to oil a Singer sewing machine and keep it in shape for many sewing jobs. Recall that a well-maintained machine is a dependable ally in helping you use sewing to express your ideas. Enjoy your sewing!

